How to Use TaskTag for Delivery Photo Proof

Table of Contents
Why Photo Proof of Delivery Matters on Construction Sites
Missed or undocumented deliveries slow down jobs, create billing disputes, and leave project managers chasing paper trails. With TaskTag, you can document every delivery in real time—complete with photos, location tags, and notes—all from your mobile device. Whether you're managing a residential build or a commercial job site, this guide shows how to streamline your construction delivery documentation process in just a few taps.
Who this is for: Dispatchers, delivery drivers, warehouse pullers, and office managers working at material supply companies.
What this solves: This workflow helps you track every delivery with photo proof, instructions, and a searchable record — so your team doesn’t have to rely on memory, texts, or paper tickets.
Common Delivery Issues That Lead to Delays and Disputes
Without TaskTag, deliveries often rely on:
- Verbal instructions or text messages
- Paper tickets that get lost
- No real-time updates for the field or office
- No proof when a delivery is disputed
This leads to:
- Missed or misplaced deliveries
- Time-consuming callbacks
- Frustrated customers
- Unnecessary re-deliveries or refunds
How to Track Deliveries with TaskTag’s Photo Proof Workflow
With this setup in TaskTag:
- You create a project for deliveries to a specific customer
- Each job site or order is a task within that project
- The task is assigned to the delivery driver and/or warehouse puller
- The task includes delivery instructions, dates, and checklist
- The driver takes and uploads photos of the delivery (address, materials, delivery ticket, site conditions)
- You and your customer both have access to the delivery record — complete with photos and timestamps
.png)
Create a new project and name it clearly, like:
- Deliveries - Westside Construction
- ABC Builders - Delivery Log
- Lowe Framing Co. - June Orders
This project will hold all deliveries for that customer or time period.

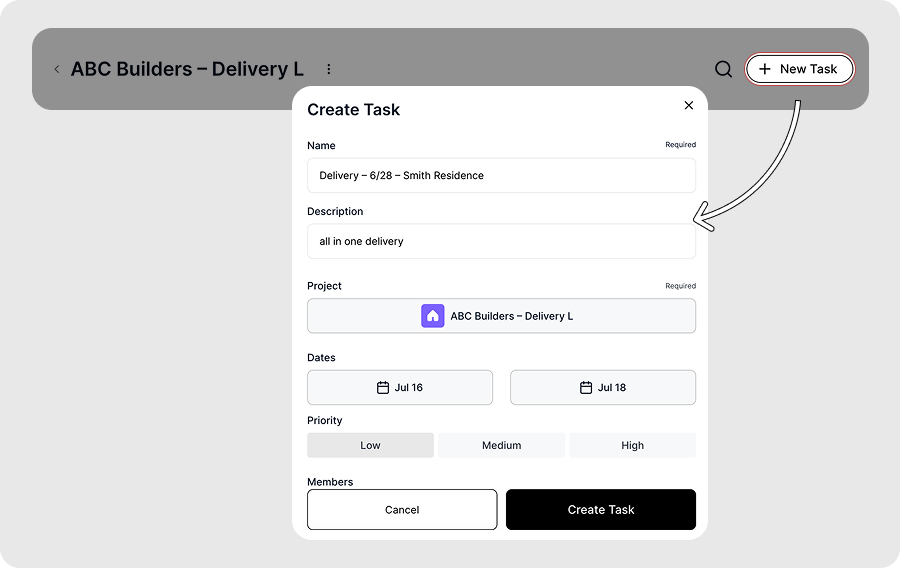
Name the tasks something like:
- Job 172 - Oakridge Apartments
- Delivery - 6/28 - Smith Residence
- Framing Pack - Elm St Project
.png)
Use the task description to include:
- Site entry instructions
- Contact name & number
- Gate codes
- Notes from sales/purchasing
- Any "Do not Deliver If..." conditions
.png)
Assign it to:
- The delivery driver (person doing the drop-off)
- The warehouse puller or yard team (person pulling and loading materials)
Make sure to connect with the assignees beforehand so you can successfully assign the task.
.png)
Use the start date for when the order is pulled.
Use the due date for when the delivery must be completed.

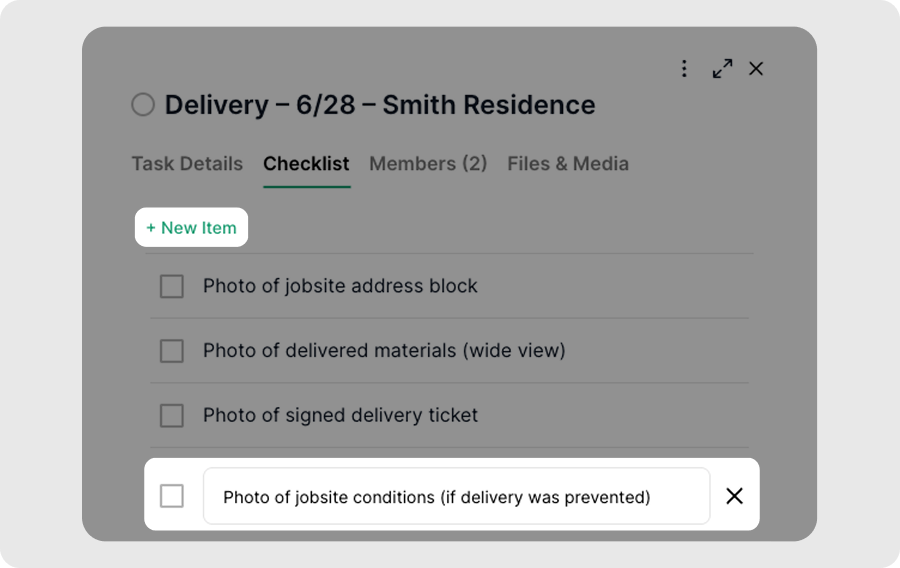
Create a checklist like:
- [ ] Photo of jobsite address block
- [ ] Photo of delivered materials (wide view)
- [ ] Photo of signed delivery ticket
- [ ] Photo of jobsite conditions (if delivery was prevented)
- [ ] Notes entered if anything was out of the ordinary
.png)
Your driver can upload photos:
- Directly in the task
- Or in chat using the project hashtag (e.g. #Westside_Construction)
All photos are time-stamped and automatically attached to the task/project!
You can:
- Share the whole project with a customer rep (like a superintendent or purchaser)
- Or just share the task if you want to keep access limited
You'll need to connect with the client beforehand for either option.
Best Practices for Delivery Photo Documentation with TaskTag
Use consistent task naming
Helps your team and customer search easily by job or date
Always upload photos in the moment
Reduces forgotten steps and ensures fast proof
Tag in chat with the project hashtag
Keeps everything grouped and searchable
Attach signed delivery tickets or receipts
Build a full paper trail in one place
Share access only as needed
Clients see what they need — not internal chatter
Use start/due dates to track delivery windows
Helps you stay ahead of schedule
Final Review Checklist Before Marking a Delivery Complete
- [ ] Project created for customer deliveries
- [ ] Task created for each job site or order
- [ ] Instructions added in task description
- [ ] Task assigned to driver and warehouse team
- [ ] Checklist added for required photo proof
- [ ] Photos uploaded on site
- [ ] Task marked complete
- [ ] Customer shared on project or task (if needed)
Business Impact: How Verified Delivery Records Reduce Risk
Reduces disputes — You’ve got photo proof of every delivery
Saves time — No need for phone calls to confirm drop-offs
Protects your team — From false claims or jobsite issues
Builds trust — Clients see you’re organized and accountable
Creates a searchable delivery log — For audits, customers, or internal reviews
“If it’s not in TaskTag, it didn’t happen. With photo proof, it’s crystal clear.”
Looking to eliminate delivery guesswork?
With TaskTag’s photo proof workflow, you’ll have an indisputable record—organized, time-stamped, and instantly shareable. Book a demo today.
Frequently Asked Questions (Delivery Photo-Proof Workflow)
1. How do I make sure delivery photos are properly linked to the correct jobsite or task?
To ensure accurate documentation, always create a unique Task under the correct Project for each delivery location. When drivers upload photos through the mobile app using the task’s hashtag, everything is automatically linked and time-stamped.
2. Can I notify the customer automatically once delivery photos are uploaded?
Yes. You can either add the customer to the Project as a viewer or send them a shareable Task link. This allows them to see real-time photo updates without needing phone calls or follow-ups.
3. What kind of delivery issues does TaskTag’s photo-proof feature help prevent?
TaskTag helps eliminate disputes over delivery timing, location errors, and incomplete drop-offs. By capturing visual proof at the moment of delivery, you protect your team and create a clear record of jobsite logistics.
Free Plan
Free
No cost, no commitment
-
Send unlimited messages on web and mobile
-
Manage projects and tasks with core features
-
Create and track up to 3 active projects
-
2GB limit for photos, videos and files
TaskTag Teams
$16/month
Enjoy Unlimited contributors
-
Track all activity across your team with the Global Activity Log
-
Organize your crews with Contact Groups
-
Get unlimited Project creation and personalized white-glove onboarding