
In the fast-paced, high-stakes world of construction, documentation is everything. Whether you're...
Before and After: Photo Documentation Tips for Roof Replacement Projects
In the world of roofing, if it’s not documented — it didn’t happen.
That might sound harsh, but photo documentation is no longer just a “nice-to-have.” In 2026, it's an essential part of roofing project management. From client transparency to warranty protection and team accountability, capturing every phase of a roof replacement project helps prevent disputes and delivers peace of mind to everyone involved.
At TaskTag, we’ve worked with hundreds of GCs, subcontractors, and field teams—especially general contractors in Houston—to build a system that makes photo documentation easy, secure, and scalable.
In this blog, we’ll break down:
- Where and when to take before/after photos
- Photo documentation tips that save time
- Must-have shots for your inspection workflow
- How construction photo documentation software integrates with other tools like CPM project management and checklists
Why Photo Documentation Matters in Roofing
Whether you're replacing a single-family shingle roof or managing a commercial flat-roof project, documenting your work is key to:
- Showing proof of performance to clients
- Protecting against insurance claims or disputes
- Securing more referrals with visual case studies
- Simplifying final inspections and approvals
- Validating contractor quality for compliance teams
More importantly—it keeps crews accountable and aligned.
Key Moments to Capture in Photo Documentation
Before Work Begins
- Existing roof condition
- Close-ups of visible damage
- Aerial view or drone/camera for full coverage
- Any client-reported issues from the estimate meeting
Pro tip: Include a timestamp and notes in TaskTag to log concerns before teardown begins.
During Demolition
- Decking condition after shingle removal
- Any surprise repairs (rotting wood, missing fascia)
- Weather protection in place (tarps, safety rails)
Installation Phases
- Ice and water shields & underlayment
- Drip edges, flashing, and pipe boots
- Vent placement and ridge cap prep
- Manufacturer specifications being followed
Use TaskTag’s inspection workflow checklists and photo requirements per stage to keep everyone compliant.
After Completion
- Full roof overview (wide shot from ground or drone)
- Close-up of details: flashing, vents, valleys, and ridges
- Clean jobsite and cleared gutter lines
- Final walkthrough photos with client present
Use these images in estimate follow-ups, client hand-offs, or even warranty registration packages.
TaskTag Tools for Smarter Photo Documentation
TaskTag’s construction photo documentation software lets roofing crews:
- Attach photos directly to tasks or checklist steps (mobile + desktop)
- Add notes, timestamps, geo-tags, and user info
- Upload “before” and “after” versions in the same thread
- Automatically sync with project reports & client exports
This allows for better coordination in roofing project management and smoother CPM project management workflows.
Real-World Use Cases
- Client Dispute Prevention
A client questions a ridge install — your timestamped photos prove accuracy. - Time Tracking + Accountability
Pair photos with time tracking software for landscaping or roofing crews to see how long each phase actually takes. - Insurance & Compliance Records
Export photo documentation by day or phase for insurance claims, QA signoffs, or municipality audits. - Marketing & Portfolio Content
Use high-quality “before and after” images in your bids, website galleries, or LinkedIn posts.
Common Mistakes to Avoid
| ❌ Mistake | ✅ Solution |
|---|---|
| Forgetting to take "before" shots | Make it part of your Day 1 task checklist on TaskTag |
| Poor lighting or blurry images | Use camera flash and hold steady — TaskTag supports high-res uploads |
| Uploading all photos at once | Upload in phases tied to task status for clarity |
| No client visibility | Export branded reports with TaskTag’s reporting tools |
Frequently Asked Questions (FAQ)
Q: Is TaskTag only for roofing contractors?
A: No — TaskTag is trusted across industries: general contractors, remodelers, landscaping professionals, and specialty trades.
Q: Can I require my crew to upload specific photos?
A: Yes! You can build inspection workflow checklists that require photo uploads before tasks are marked as complete.
Q: How secure is stored photo data?
A: All data is encrypted, backed up, and safely stored in the cloud. You can access photos anytime from desktop or mobile apps.
Q: What formats can I export media in?
A: Export task logs, checklists, and photo reports in CSV, PDF, or project summary formats — complete with timestamped images.
Q: How does TaskTag help with large-scale commercial jobs?
A: TaskTag supports CPM project management, multi-crew teams, schedule tiers, and document tracking across stakeholders for commercial builds.
Suggested Graphics for This Blog
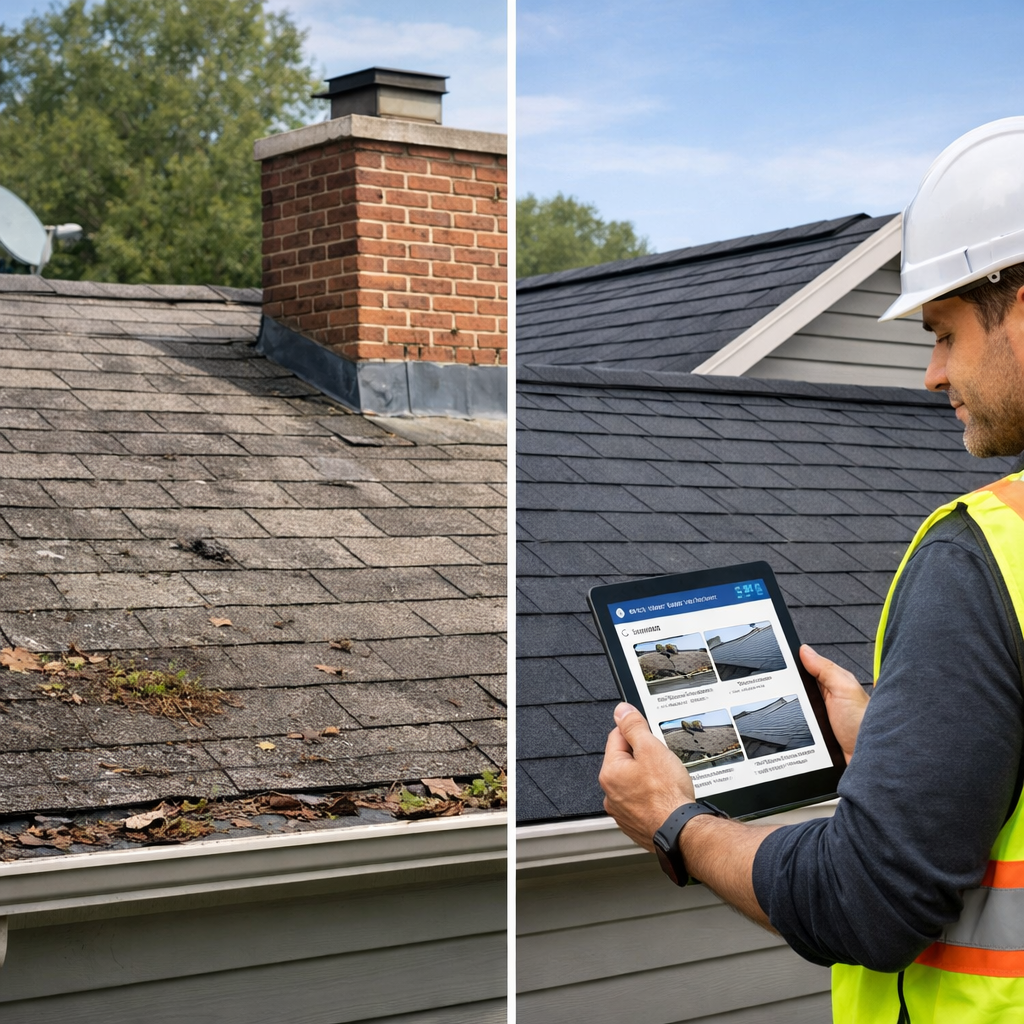
- Hero Graphic
- Split or side-by-side photo of a jobsite before and after roof replacement, with TaskTag UI showing photo thread/comments overlay.
- Photo Checklist Progress Tracker
- Graphic showing a sample inspection checklist with embedded task photos per phase: demo, underlayment, shingles, cleanup.
- Mobile Upload Workflow Visual
- Screenshot of TaskTag mobile app during a project walk: checklists, photo attachment button, and status update flow.
Ready to simplify your roofing documentation—and boost client trust while you’re at it?
👉 Book a demo with TaskTag and see how effortless tracking can be.
.png?height=200&name=3%20(4).png)

